So, i found a new line of paints and enamel modelling effect washes last year. They were a brand called AK-Interactive. I wanted to start picking up more of them, as they are great products; acrylics for paint/air brush, and enamel effects for doing panel washes, filtering, rust, grime etc.
Hard times had hit putting a damper on my hobby time and enthusiasm, but the end of last year brought an upswing and will hopefully put things into a better outlook.
I went to start picking up some more of these paints, and found out the line had been dropped. Due to infighting amongst the owner and designer of the paint line, the whole line stopped production for a while.
I found out shortly there after that the line was re-introduced as Ammo by Mig Jimenez .
This line of products is amazing. They are primarily marketed for military and sci-fi scale modelers.
The acrylic line is mainly realistic camoflage colors from world war 2, but has recently started pushing into modern lines of colors (Arab-Israeli war) Cold War, Middle Eastern conflicts.
The enamels are mainly washes and specialized effects.
I picked up some new colors so that I could finish up my Dream Forge Games Kriegsmarine models, and hopefully get to my Leviathan some time in 2014.
I started picking up the Dunklegelb line of paints (WW2 German tank coloring), which is what I'm using on my Kriegsmarine.
I hope to have some painted Kriegsmarine in the near future now that these paints are here.
Tuesday, February 18, 2014
Saturday, September 21, 2013
Painted models kill more enemies!
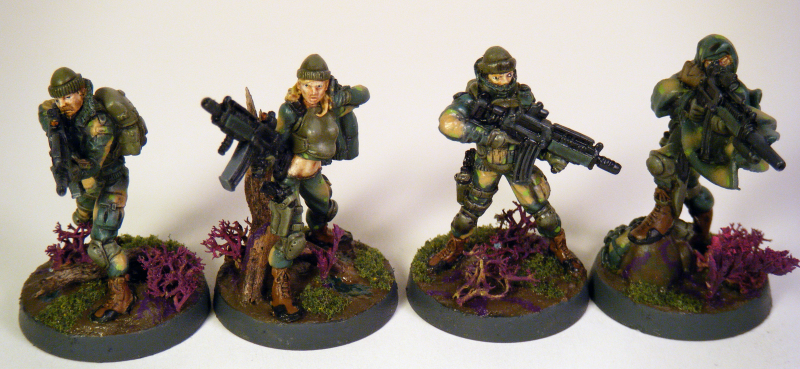
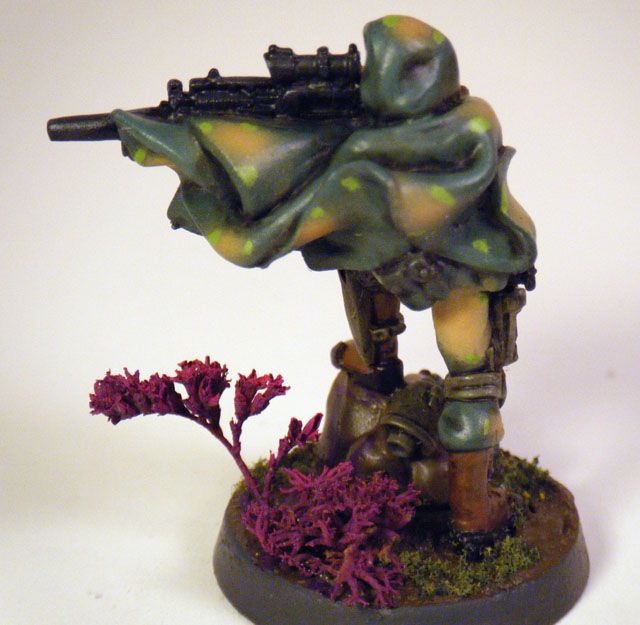
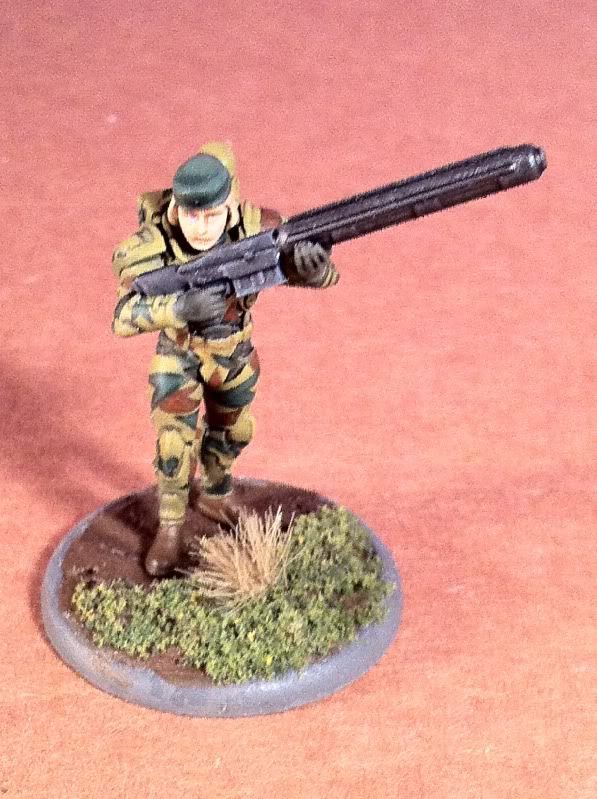
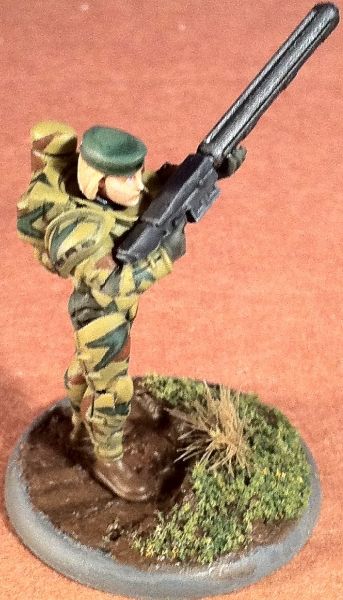
I finished the 4 Infinity models I have been working on. 3 Line Kazaks, and a Scout with AP Sniper rifle.
I had hoped to get more done on my week off work, but life conspired against me.I did at least manage to get these finished and based, and put together almost all of the remaining Ariadna models for my Infinity collection.
Camoflage can blur a model's lines if overdone at this scale, and I think I did a decent job of showing a jungle pattern without making the models details disappear.
Some people suggested a little bit of color, which I have done with the purple alien vegetation on their bases, and little bright spots on the uniforms.
Here's all 4 finished:
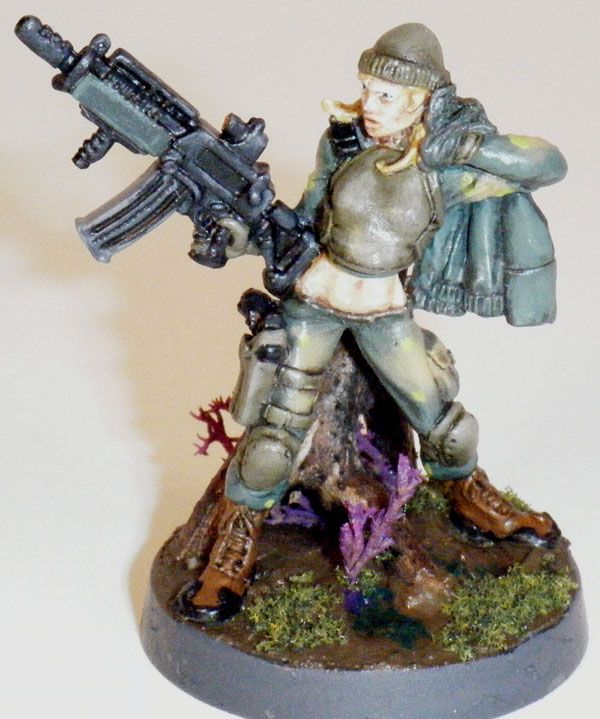
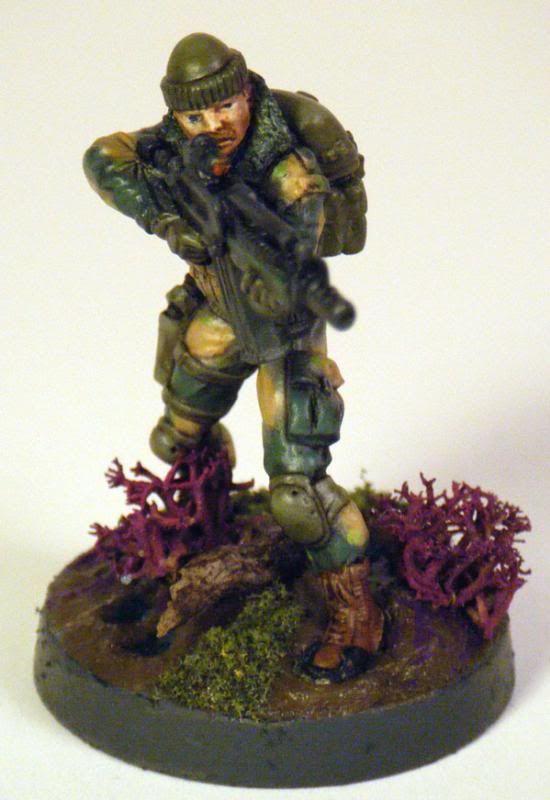
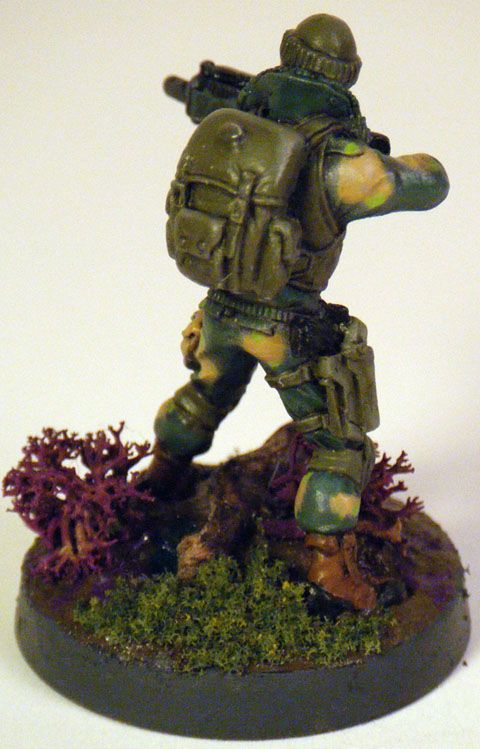
And now a couple of individual shots. Once again, my older camera just doesn't quite cut it :( I really need to get a digital camera that will take good macro shots for not a lot of dough.
Line Kazaks Front and back: #1
#2
Scout with AP Sniper rifle: I also proxy this model as a Kazak Forward Observer.
Next up: Tankhunters, Veteran, SAS, Paras etc. etc.
Sunday, July 28, 2013
So. I've been pressed into picking up and playing some Infinity 28mm mini's from Corvus Belli, with a friend. I've had some mini's from the Ariadna faction for a while, but with no time to get out and learn the game until recently, I've had very little impetus to get paint on models.
This past weekend there was demo day for the game at an LGS in my metroplex. I just happened to have the day off, kids had a sitter, and my wife was gone to a music festival with a friend all day. Great time for some gaming.
I set about getting some miniatures ready, and primed a few to try out a some test camo schemes.
My minis will be in a Jungle Pattern, as we figure most of the fighting they will be involved in will center on the planet Paradiso, which has a recently released campaign book.
Being an alien jungle planet, I figured I can get away with a little departure from more muted camo schemes, so I'm going to try to add a few bright splashes of color to simulate the teeming flowers and wildlife on the planet.
Here's a few shots of my test subjects so far:

Above are the Line Kazaks I own, in various stages of paint.
I think the one on the left will be the standard camo for uniforms across my Ariadna force. This will tie the whole collection together. To separate the units along their national identities, I think I'll use differing colors for their armor/web gear.
I also managed to get a few things put together for terrain. I picked up a couple of cargo container pieces from Underground lasers not too long ago. They were easy to construct and look to be great for use in Infinity. I bought 2 of the narrow, and 1 wide cargo containers, which came with some extras in the form of ammo crates. These make for some great scatter terrain, and can be used on top of the containers for sniper cover.
I broke out my airbrush and my AK Interactive effects to try out on the crates. I think they came out decent. I wanted a worn, faded, semi-rusty look.
I hope to have more work done on the Ariadna miniatures soon. The entire army only has 16 or so models, so I should be able to get them done and go back to other stuff on the never ending mini pile.
This past weekend there was demo day for the game at an LGS in my metroplex. I just happened to have the day off, kids had a sitter, and my wife was gone to a music festival with a friend all day. Great time for some gaming.
I set about getting some miniatures ready, and primed a few to try out a some test camo schemes.
My minis will be in a Jungle Pattern, as we figure most of the fighting they will be involved in will center on the planet Paradiso, which has a recently released campaign book.
Being an alien jungle planet, I figured I can get away with a little departure from more muted camo schemes, so I'm going to try to add a few bright splashes of color to simulate the teeming flowers and wildlife on the planet.
Here's a few shots of my test subjects so far:
Above are the Line Kazaks I own, in various stages of paint.
I think the one on the left will be the standard camo for uniforms across my Ariadna force. This will tie the whole collection together. To separate the units along their national identities, I think I'll use differing colors for their armor/web gear.
I also managed to get a few things put together for terrain. I picked up a couple of cargo container pieces from Underground lasers not too long ago. They were easy to construct and look to be great for use in Infinity. I bought 2 of the narrow, and 1 wide cargo containers, which came with some extras in the form of ammo crates. These make for some great scatter terrain, and can be used on top of the containers for sniper cover.
I broke out my airbrush and my AK Interactive effects to try out on the crates. I think they came out decent. I wanted a worn, faded, semi-rusty look.
I hope to have more work done on the Ariadna miniatures soon. The entire army only has 16 or so models, so I should be able to get them done and go back to other stuff on the never ending mini pile.
Thursday, May 30, 2013
Another lull in posting. :( At least I'm doing come collecting in the meantime.
I have new terrain from www.undergroundlasers.com that I will be reviewing soon, I hope. I picked up some very nice laser cut mdf containers from their kickstarter. But, more on them later.
One piece of equipment I picked up recently was a Badger/Sotar 2020-F Airbrush, as seen here;
This small, unassuming box contains a high end airbrush manufactured by Badger Airbrushes under the Sotar brand name. These are very high quality, expensive brushes that come with very good warranties. They can be found on Ebay and Amazon in the $250+ range, up to $400.
I managed to pick one up from Amazon during a sale for $78! I could not pass that up.
I have not used it yet, as it uses a different size hose adapter than the one found on my Iwata hose and brushes. Luckily, the adapter can be had for under $5.
This version is the 2020-F (Fine needle) version. It will do very precise line work, and is good for doing precision lining and detailing. I plan to work my way up to it after getting more comfortable using my Iwata Neo for everyday use.
Here are the box contents:
It is a very nicely constructed airbush, made from quality materials. The fit and finish is very good, and the action is smooth as silk. I can't wait to try it out when I feel my abilities can do it justice.
Just a small update about this. I'll have more to post in a bit when I get a decent light box set up at home.
I have new terrain from www.undergroundlasers.com that I will be reviewing soon, I hope. I picked up some very nice laser cut mdf containers from their kickstarter. But, more on them later.
This small, unassuming box contains a high end airbrush manufactured by Badger Airbrushes under the Sotar brand name. These are very high quality, expensive brushes that come with very good warranties. They can be found on Ebay and Amazon in the $250+ range, up to $400.
I managed to pick one up from Amazon during a sale for $78! I could not pass that up.
I have not used it yet, as it uses a different size hose adapter than the one found on my Iwata hose and brushes. Luckily, the adapter can be had for under $5.
This version is the 2020-F (Fine needle) version. It will do very precise line work, and is good for doing precision lining and detailing. I plan to work my way up to it after getting more comfortable using my Iwata Neo for everyday use.
Here are the box contents:
It is a very nicely constructed airbush, made from quality materials. The fit and finish is very good, and the action is smooth as silk. I can't wait to try it out when I feel my abilities can do it justice.
Just a small update about this. I'll have more to post in a bit when I get a decent light box set up at home.
Friday, April 26, 2013
Slow, but steady.
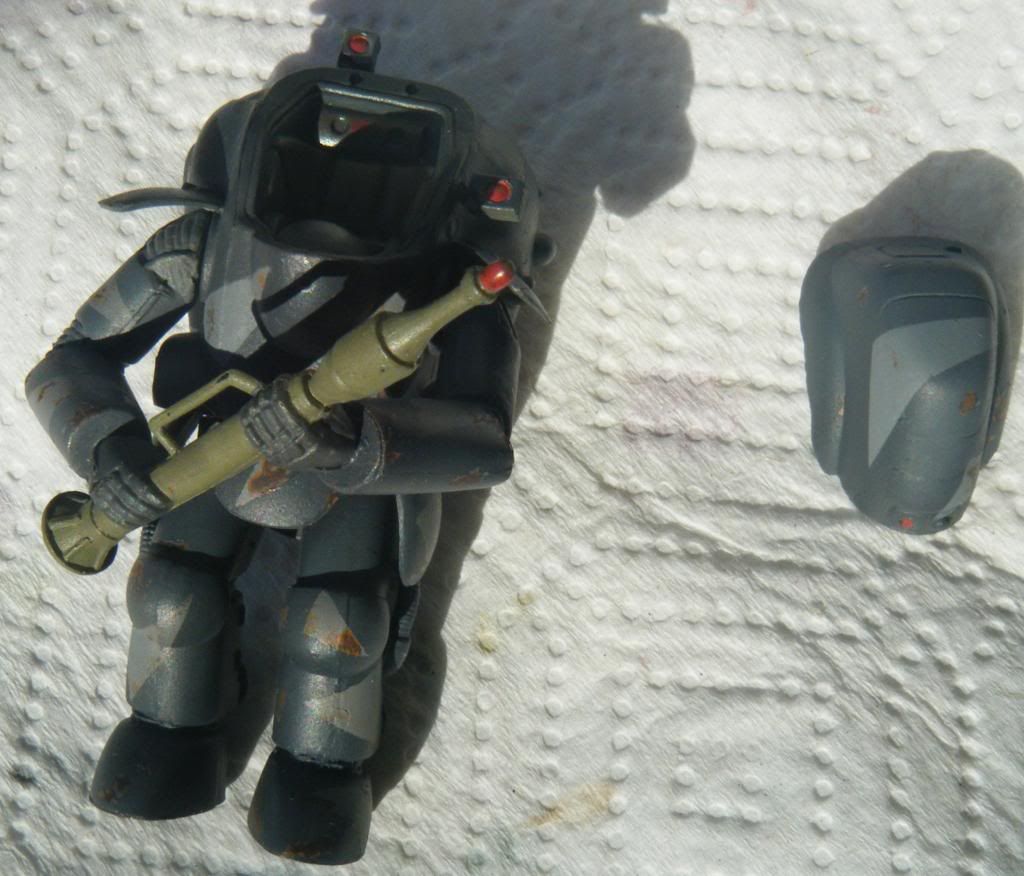
More work done with the new techniques. I started working on the scrap terrain piece, and got some more work done on the Ma.K figure.
I picked up some oil colors today, and moved to doing panel lining and some additional grime. It came out well, I think. I'll get some pics of that stage after it dries.
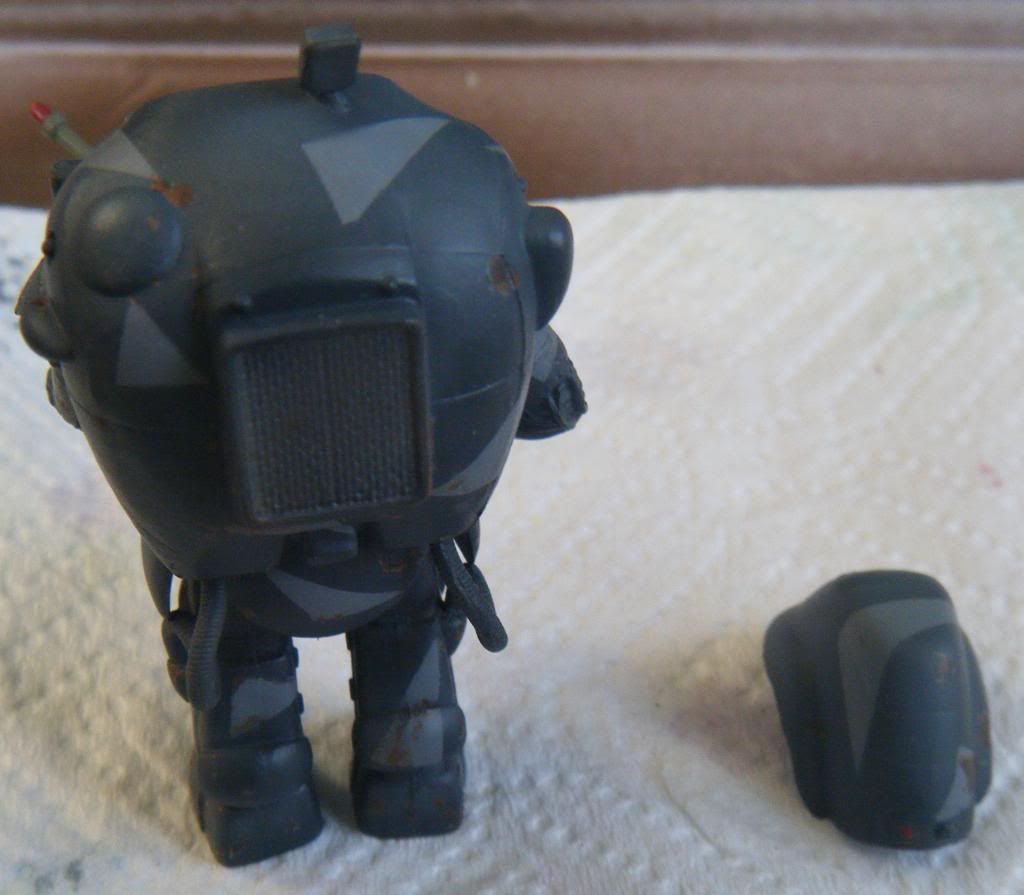
Here are a few shots after the rust stage has dried.

And to the left we have a picture of the new terrain piece. I used my airbrush to do the base rust layer, then worn effects, and finally the VAC Dark Yellow final layer. Then I did the paint chipping and rust/grim work with the AK interactive enamels. I just need to seal it with a dull coat of some kind.
I picked up some oil colors today, and moved to doing panel lining and some additional grime. It came out well, I think. I'll get some pics of that stage after it dries.
Here are a few shots after the rust stage has dried.
And to the left we have a picture of the new terrain piece. I used my airbrush to do the base rust layer, then worn effects, and finally the VAC Dark Yellow final layer. Then I did the paint chipping and rust/grim work with the AK interactive enamels. I just need to seal it with a dull coat of some kind.
Saturday, April 20, 2013
Trying my hand at some enhanced paint techniques.
So I made some painting and modelling progress.
I wanted to practice some new techniques using the AK interactive items I picked up, so I built a small terrain piece using a plastic Coffee container to try on.
I also started work on one of the Ma.K Melusine models I have. I'm using my Iwata Neos airbrush on these models to make it quicker, and get some practice in.

Here are a few in progress shots. Again, not the best as I need a new camera and photo booth setup.
First is the primer coat and rust colors on the left. Not pictured is the coat of AK Interactive Worn Effects fluid.
On the right is the first camo color layer on the Melusine, Vallejo Model Color Neutral Grey.
Here we have the masking work for the camo scheme on the left. I'm trying to go with a Dark grey pattern breaker/ Night warfare scheme on this guy to see how it looks. I may make 2 others in this scheme.
On the right we have the Vallejo Air color Dark Blue Grey top coat.

Next up we have a couple pictures after removing the paint masks, and doing some light chipping work on the Melusine. It went surprisingly well. I could have gone overboard with it, as the paint came off very easily after wetting with a brush and giving it a little time to work it's magic on the Worn Effects fluid.
I did want to show some wear on this model, but not look like it's been on the Eastern Front for a year or so.
Another couple of shots out of direct sunlight.
After doing the chip work with a flat brush and a toothpick, I went in and added some dark spots with the AK Interactive Chipping Color Acrylic paint. I didn't want the rust spots to be too stark, but look a bit fresh.
Last, I coated the Melusine with a VMC Satin Varnish coat. I may pick up a gloss coating to do before the next step, as I heard it works better for the enamel washes than Satin.
Next up will be the AK Interactive Streaking Grime set to give this a nice used look, and some weathering powders I picked up a while ago.
I wanted to practice some new techniques using the AK interactive items I picked up, so I built a small terrain piece using a plastic Coffee container to try on.
I also started work on one of the Ma.K Melusine models I have. I'm using my Iwata Neos airbrush on these models to make it quicker, and get some practice in.
First is the primer coat and rust colors on the left. Not pictured is the coat of AK Interactive Worn Effects fluid.
On the right is the first camo color layer on the Melusine, Vallejo Model Color Neutral Grey.
On the right we have the Vallejo Air color Dark Blue Grey top coat.
I did want to show some wear on this model, but not look like it's been on the Eastern Front for a year or so.
After doing the chip work with a flat brush and a toothpick, I went in and added some dark spots with the AK Interactive Chipping Color Acrylic paint. I didn't want the rust spots to be too stark, but look a bit fresh.
Last, I coated the Melusine with a VMC Satin Varnish coat. I may pick up a gloss coating to do before the next step, as I heard it works better for the enamel washes than Satin.
Next up will be the AK Interactive Streaking Grime set to give this a nice used look, and some weathering powders I picked up a while ago.
Labels:
Droptroops,
Gaming,
German,
Miniatures,
Painting,
Sci-Fi,
SoTR,
Terrain
Thursday, March 28, 2013
Ada, fini! Plus new painting supplies.
I finished up my first of 5 Ada models. This is going to be the actual Ada mini if/when the Iron Core rules come out in the future (fingers crossed!!).
I used the included base that is provided with the Dreamforge Models Ada figure. It has a smaller lip than most of the lipped bases on the market these days, but I was able to work with it.
It's done in a dark earth/turf with a field weed to break it some. Ada is standing in the footstep of an enemy Leviathan that she is tracking.
I could probably do a little more work on it, but I'm just happy getting something painted and based at this point.
Still need a good lighting/picture setup. For that matter, probably a better digi-cam. Old and busted just isn't cutting it any more :(
I also picked up some new paint supplies. I've decided to try pushing the envelope of my paint skills, and branch out into some enamel/oil techniques used in scale model painting.
I've found some amazing videos on YouTube (look for enamel or oil washing / weathering for models).
I picked up a couple of things from AK Interactive that I hope will help me paint better looking models.
I snagged the Streaking Effects Set to work on my grimy looking effects, and I've seen it used for panel lining and pin washing.
I also picked up the Worn Effects fluid to try my hand at paint chipping (similar to the Hairspray technique).
And last, I picked up a bottle of Chipping Effect color, which is an acrylic color used to replicate paint chips, as a base color under the final layer of paint.
I'm hoping to start working on my techniques with the new supplies soon, on the 9 Ma.K Melusine models I picked up to use as light mecha for my German forces.
We'll see how it goes, and if I can update before another month goes by.
I used the included base that is provided with the Dreamforge Models Ada figure. It has a smaller lip than most of the lipped bases on the market these days, but I was able to work with it.
It's done in a dark earth/turf with a field weed to break it some. Ada is standing in the footstep of an enemy Leviathan that she is tracking.
I could probably do a little more work on it, but I'm just happy getting something painted and based at this point.
Still need a good lighting/picture setup. For that matter, probably a better digi-cam. Old and busted just isn't cutting it any more :(
I've found some amazing videos on YouTube (look for enamel or oil washing / weathering for models).
I picked up a couple of things from AK Interactive that I hope will help me paint better looking models.
I snagged the Streaking Effects Set to work on my grimy looking effects, and I've seen it used for panel lining and pin washing.
I also picked up the Worn Effects fluid to try my hand at paint chipping (similar to the Hairspray technique).
And last, I picked up a bottle of Chipping Effect color, which is an acrylic color used to replicate paint chips, as a base color under the final layer of paint.
I'm hoping to start working on my techniques with the new supplies soon, on the 9 Ma.K Melusine models I picked up to use as light mecha for my German forces.
We'll see how it goes, and if I can update before another month goes by.
Labels:
Droptroops,
Gaming,
German,
Miniatures,
Painting,
Sci-Fi,
SoTR
Subscribe to:
Posts (Atom)